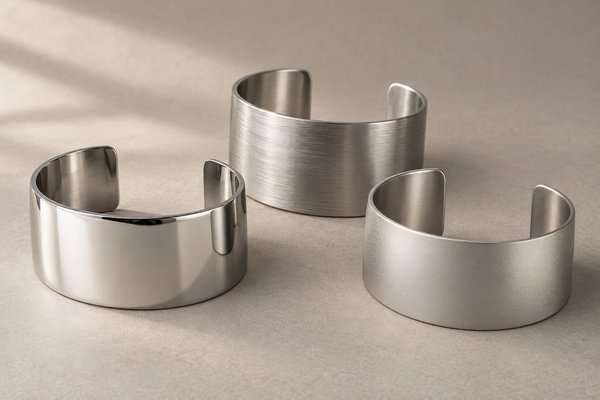
The same cuff can communicate three different design directions when its surface changes. Mirror polishing emphasizes reflections, brushing adds visible direction, and a matte treatment creates a softer appearance. The choice affects photography, perceived style and the details your inspection team needs to watch. It should be a collection decision supported by a physical reference, rather than a one-word instruction that every supplier interprets differently.
Choose a jewelry finish by comparing physical samples under consistent lighting. Specify gloss, texture direction, coverage and edge transitions. Mirror, brushed and matte are useful categories, but each needs a retained reference and an agreed inspection method.
For technical color-measurement background, see CIE colorimetry reference. Agree the relevant viewing and measurement conditions for the selected surface finish.
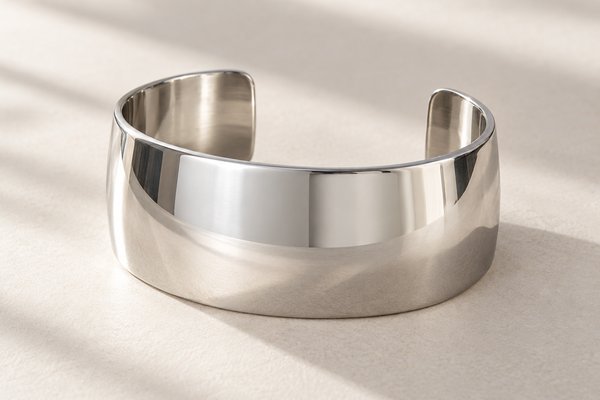
Mirror finish: evaluate reflections and surface preparation
A mirror finish makes the surface highly reflective. That can suit a clean, sculptural collection, but it also makes dents, waviness and polishing marks easier to notice under directional light. Review broad flat areas and curved transitions separately. A bright front does not tell you how well the inner surface or underside has been finished.
Compare the surface direction of Men’s Silver Stainless Steel Brushed Dog Tag Necklace with a cuff project based on Stainless Steel Cuff Bracelet. Request physical finish samples under the agreed lighting before approving the appearance.
Ask which surfaces require the same polish and which may have a different treatment. On a wide cuff, the outside, ends and inside can be specified separately. Avoid judging all samples under flattering diffuse light. Use a consistent inspection setup that reveals the type of surface irregularity you intend to control without creating arbitrary demands that were never agreed.
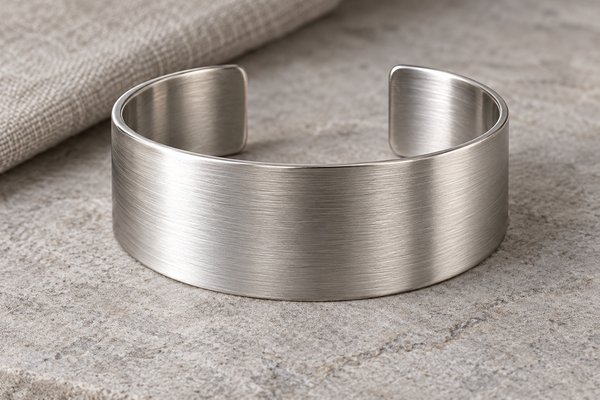
Brushed finish: define the direction and boundaries
Brushing creates a visible texture, so direction matters. A straight band may have a lengthwise grain, while a curved piece can require a more detailed instruction. Show where the grain starts, how it crosses a corner and whether adjacent components should align. An arrow on a drawing can be more useful than several paragraphs describing the desired look.
Inspect for patches where the texture changes unexpectedly or where polishing has softened the intended pattern. Compare the reference after final finishing, because later operations can alter the surface. If a design mixes brushed and polished areas, define the transition line and assess it on a complete piece. A small loose sample panel cannot demonstrate every boundary.
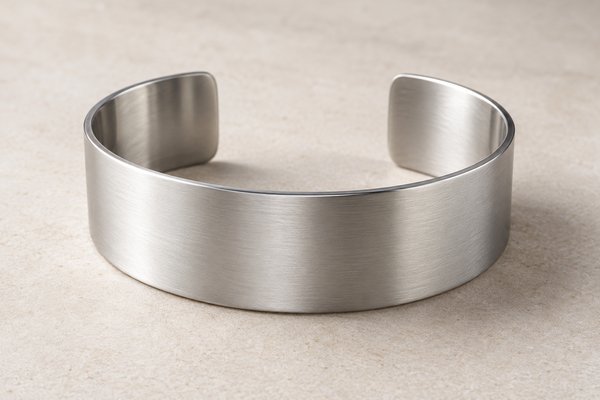
Matte finish: ask what creates the appearance
Matte describes appearance rather than a single manufacturing process. Ask the supplier how the proposed finish is produced and request a sample of that exact route. A satin surface and a visibly textured blasted surface may both be described as matte, yet they can photograph and feel quite differently. Confirm the intended result instead of relying on the label.
Review color and gloss together, especially if a coating is added. Keep the underlying surface preparation in the specification. Do not assume a finish is more durable merely because it looks less reflective. Performance claims need a relevant method and evidence; an appearance sample primarily establishes visual expectations and workmanship requirements.
Compare finishes through the retail workflow
Photograph each candidate in the same setup, then compare how it reads on a product card, website thumbnail and wholesale line sheet. A subtle grain can disappear in a small image, while mirror reflections may require more controlled lighting. Choose the finish that supports your actual presentation rather than the one that looks best in an isolated sample photograph.
Record the selected finish with an approved physical sample and representative photographs. The photographs help communication, but screen settings and lighting limit their use as color or gloss standards. For reorders, keep the reference protected from damage and identify its revision. Review replacement references deliberately instead of gradually accepting a different finish as normal.
Finish comparison worksheet
| Finish | Review point | Reference needed |
|---|---|---|
| Mirror | Reflections reveal surface shape and polishing marks | Complete cuff with approved inner and outer surfaces |
| Brushed | Grain direction and changes around corners | Drawing with direction arrows and finished sample |
| Matte | Texture, gloss and proposed production route | Physical sample of the exact proposed process |
Compare all three under the same light. Make the design choice first, then record the inspection points and photography requirements for the selected finish.
Specify each surface separately
Use front, inner, rear and edge views to mark where each finish applies. For brushing, include direction arrows; for matte treatments, identify the proposed route and retained reference. A single word such as satin does not resolve a difference in texture, gloss or coverage.
Prepare views using the photography brief, and protect the approved surfaces through the wholesale packaging review.
Surface finish zone specification
Use these fields in your purchase order or sample review. Numerical values and IDs below are illustrative, not live product specifications, test results or confirmed commercial terms. Agree measurement methods, tolerances and acceptance criteria for your actual design.
| Field | Record or illustrative example | Verification before release |
|---|---|---|
| Main face | Mirror / brushed direction / matte reference | Choose and identify a physical master for each finished zone |
| Edges and reverse | Explicit finish coverage and transitions | Check visible boundaries and polishing marks under agreed lighting |
| Finish change | New process, texture or component source | Review the finished part again; do not infer scratch resistance from texture alone |
Buyer FAQ
Is matte always more resistant to scratches?
Appearance alone cannot establish scratch resistance. Compare relevant performance evidence for the actual material, finish and coating.
Are photographs enough to approve a finish?
They support communication, but a retained physical reference is more dependable for gloss, grain and texture comparison.
Request physical finish evidence
To compare mirror, brushed and matte options, ask for three separately identified physical samples of the same base shape. Photograph them together under consistent neutral lighting, then review each under a second viewing angle. Record brush direction, target gloss or texture reference, allowable visible marks and whether the chosen finish applies to edges and undersides. Digital images help communicate the brief; the agreed physical master sample remains the production reference.
Should the reverse have the same finish as the face?
Specify it explicitly. A design may use different finish zones; identify each zone and approve the transitions on the actual finished sample.
Plan your wholesale project
Explore our stainless steel bracelets and bangles to compare relevant product designs before preparing your specifications and quotation request.
For the next approval step, see our PVD color consistency guide. Request a surface-finish sample review with preferred mirror, brushed or matte references and the relevant SKUs.
Images in this article are illustrative product concepts; they are not photographs of an approved sample or inspection evidence.